Get the Bug & Miss Look!
The super talented and lovely Brooke from Bug & Miss has shared how she made the gallery dress into a reversible tunic.
The reversible gallery dress is great for showing off your fav fabrics – it’s like two dresses in one!! And because all the seams are hidden in a lining it’s perfect for quilted/pieced styles or applique work – so many possibilities; Loving it!

So to make your gallery dress reversible, all you need are your bodice pieces – front and back (I have traced my pattern pieces on to intertrace, an interfacing made specifically for pattern pieces). To make your gallery dress fully reversible, we need to change the back closure slightly – I’ve used snaps in this tute, but you can also use buttons.

The front bodice will go on the fold as per the pattern, but the back piece we are going to cut into two, and do a row of buttons or snaps down the length DON’T CUT THE BACK BODICE YET.
You’ll need two front bodices, cut on fold, one in each of your chosen fabrics, and 2 pairs of mirror image back bodices, 1 mirror pair of each of your fabrics. For this tute, I’ll refer to them as main and lining.

To keep the fit on your gallery dress perfect, we need to add our button/snap overlap to the fold edge of the pattern, as well as a seam allowance. In this one, I wanted a 1” overlap in the back for the buttons, so 1/2” on each side, PLUS 3/8” on each side for SA. Total we are adding to our pattern piece is 7/8”. You can either make yourself a new pattern piece adding 7/8” along the centre back edge, or just use a quilting ruler like I’ve done to create your new cut line as you go. Extended the neckline and hem to meet your new cut line.
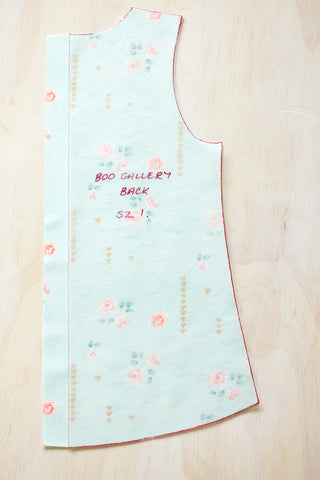
You should end up with two sets of these. One mirror pair main, and one mirror pair lining.

You also want strips of 1” iron on interfacing to stabilise the snap/button overlap. Now we have our pieces, we are ready!
COLLAR

If you want to do a collar like the gallery dress, you would sew it to your front bodice now, but note, you will not be able to reverse the collar if you sew it as per the pattern with the collar sewn into the shoulder seams.
If you want a reversible collar, draw yourself a new collar piece that has both ends enclosed (like this one) so that you can flip it to either side.
I am having a reversible doily collar, so I am going to sew it on after we do the shoulder seams.

Sew your shoulder seams, RST for both the main and the lining, and press the seams open.
Sew on your collar if you have chosen to add one.

Now we are going to lay our dresses RST, matching up the armholes, neckline, hems and centre back.
Starting on the back bodice, sew along the hem line, up the centre back, around the neckline and down the opposite side, matching our previous sewing line.
Sew your armholes from side seam to side seam.
Sew your front hem.
Clip your curves. I went around my whole bodice with pinking shears, but that is optional, as long as the curve in the neckline, sleeves and hem sit nicely you can stop there.

Before you turn your dress out, iron on your strips of interfacing down the centre back next to your line of stitching. I like to do both sides (main and lining) for stability, especially if using snaps, but you can get away with one strip on each centre back if you wish.

Turn your dress right side out, and give it a good press.

Now lay your side seams together and make sure they match up from armhole to hem. If they don’t you might have to turn it wrong side out again, and just graduate the curve of the longer hem slightly inwards so they meet nicely.

Now pinch three layers (it doesn’t matter which 3) and either clip or pin them – I use clips because I stab myself with pins; always


Those three clipped layers are going to stay together while we take the fourth layer, and wrap it around the dress so it comes back to meet the 3 clipped layers. The rest of the dress will be sandwiched inside.

Match up your armhole seams and hem and then pin if you need to. We are going to sew around the side seam now.

Before turning the dress right side out, I like to press one of the seam allowances away from the seam to make it easier to get a flat seam once we’ve turned it.

Turn the dress right side out, and iron your seams open.

Next, we have to do the same to the other side seams BUT we are going to leave a 3” turning hole.
Same as before, clip or pin 3 layers, and bring the loose layer around the rest of the dress so that all 4 layers are together. Match your armhole and hem, and this time, even if you don’t normally use pins, pin where your opening will be. You don’t want to sew around your side seam and forget to leave that turning hole.

Again, press one seam allowance away from the seam. I also like to press both edges of my turning hole, using the stitch line as my guide, to get a nice, crisp opening to hand sew later.

Turn your dress out through the turning hole and press again, working to get those seams open and flat.
Now you just need to use a slip stitch to close the opening. There’s a great video here if you’ve never done a slip stitch before: https://www.youtube.com/watch?v=WbE5hXt27uU
Reversible items for sale do not require tags (size, or care instructions) but if you do wish to include your business tag, you could sew it in here.
BACK CLOSURE

Overlap both back bodice pieces by 1” (The Boo! card is so perfect for this!) and mark where you want your snaps or buttons to go.
I chose snaps here because they look the same on both sides of the dress, so are perfect for reversible items but if you wish to use buttons, you would do bottonholes down one side of your back pieces, and sew buttons on each side of the opposite back piece.
Finish up and you’re done!
Too easy! Enjoy xx B