
Pattern Hack: Light Up Dress
What you need...
- Spandex Skater Dress, Sleeved Skater Dress or Flounce Dress
- Donut Skirt (free pattern)
- (optional) Tulle Overlay Cut Guide (free pattern)
- Battery powered string lights (aim for about 5m long and between 40-100 lights).
You can get them everywhere at the moment (Big W, Target, Kmart, Bunnings, etc.). Make sure you test they work before you start!! - Stretch poly tulle or net approx. 1m for every layer (or use the guide in the tulle overlay pattern).
I used 4 layers (2 layers of solid white, 2 layers of sparkly glitter on white).
You can find stretch net on the website here.

Create bodice and under skirt
Make bodice and skirt separately according to the pattern you are using.
DON'T ATTACH THEM TOGETHER AT THE WAIST.
> If you have all the patterns, I recommend using the skirt from the Sleeved Skater Dress since it is the most fabric conservative!
> I used metallic fabric for my under skirt because I wanted the lights to bounce off the sparkles, but you barely see this layer and can just use solid fabrics to keep it more economical too.
Create battery pack casing
Measure battery pack. Mine was about 8cm long x 5cm wide.
I cut a rectangle 10cm (length + 2cm) x 20cm (4 times width).
Fold short edge down about 1.5cm and hem. 
Fold casing up the width of the battery pack + about 1.5cm.
Pop battery pack inside to make sure it fits and do any tweaks if necessary. You want it to fit in there snuggly so it doesn't pop out during high energy twirling!
Turn so right sides face out and trim back top flap so it is only about 2cm long.
Mark centre and centre back of skirt, align and baste casing to under skirt. 
Create tulle skirt overlay pattern piece
Use the Tulle Overlay Cut guide pattern for a fuller skirt.
Cut tulle layers
Cut 2 tulle under skirts and 2 tulle top skirts.
Lights layout
Now is a good time to pull out your lights! 
Grab your 2 tulle underskirts and place your lights on top to see how many rows of stitching you need. For a 5m string, you can get away with 2 channels. 
Measure around about half way to create a stitching guideline for your channels with an air/water erasable marker for light colours or chalk for dark colours. 
Mark out a gap wide enough to fit your hand through under the centre back. This will be used for threading the lights into the bottom channel (trust me on this, it cuts down threading time by about 2hrs)!
Stitch channels. I did one about 2cm from the hemline and the other following the guideline I created. 
On one layer only you need to create a cut so that the battery pack can come out to go into the casing. Do this by stitching down the centre back about 6cm, across about 1cm and back up to the top. Then cut down the middle. The stitching will just help to avoid ripping. 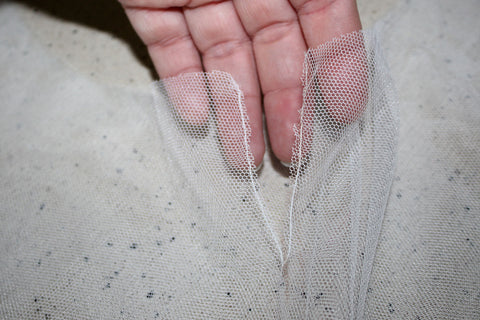
Thread Lights
Thread your lights through the channels. Use the opposite end to the battery pack and start threading through the bottom channel first using your hand to guide it all the way around. Then progress to the 2nd channel to keep threading. It is a bit fiddly and you need to make sure the lights are evenly distributed through the 2 channels and the fabric is not bunching. Take your time with this step, it is the most important bit of all!
When I am happy with my light placement through the channels, I set my machine to the widest zig zag stitch and very carefully stitch over the cord. I use the hand wheel to do this and am very very carefully do it so that I don't stitch through the cord. I do this about every 30cm or so. This will just help to keep the lights in position and nice and evenly distributed. You can hand stitch this too if you prefer but I don't have time for that madness!
Place your other 2 layers of tulle on top of your lights layers. Match quarter points.
Make sure the opening you created for your battery pack to come out is on the BOTTOM LAYER. I didn't do this for this dress because I wasn't concentrating... FAIL!!
Baste around the top of the 4 tulle layers to secure them together.
Gather around the top of all 4 tulle layers. Position tulle skirts over the under skirt align at quarter points and baste around the top.
Stitch bodice to skirt layers and remove basting stitches so stretch is not restricted. Pop the batteries in your lights in and you are ready to shine!!
Because it is just a special occasion dress, I am not worried about the lights being permanent and just spot clean as required.
You can also just do the tulle layers as a skirt on their own with the donut skirt waistband that you can pop over an existing dress so the dress part can still be worn on its own and washable.


And the original request that started it...
"I would like a mermaid dress with lights that flash for the school disco..." Holly Age 6

